DIY Pool Plaster: How to Do It Like a Pro (Expert Tips)
Pool plaster has a reputation for being straightforward. Spread it, smooth it, fill the pool, done. That’s the myth.
The reality is tougher. You’re dealing with heavy material, precise prep, and a finish that shows every mistake in bright daylight.
The Reality Behind DIY Pool Resurfacing
Let’s start with the part most guides skip.
DIY pool resurfacing is physically brutal and technically unforgiving. Many skilled tradespeople can form, pour, and finish flat concrete all day, then struggle badly inside a curved swimming pool. A wall-to-floor transition, a light niche, and a tight return fitting all punish sloppy hand work.
That’s why veteran installers often say a first-time finish ends up feeling like 200 grit sandpaper, not a smooth surface. It may hold water for a while, but it rarely looks like a professional pool job.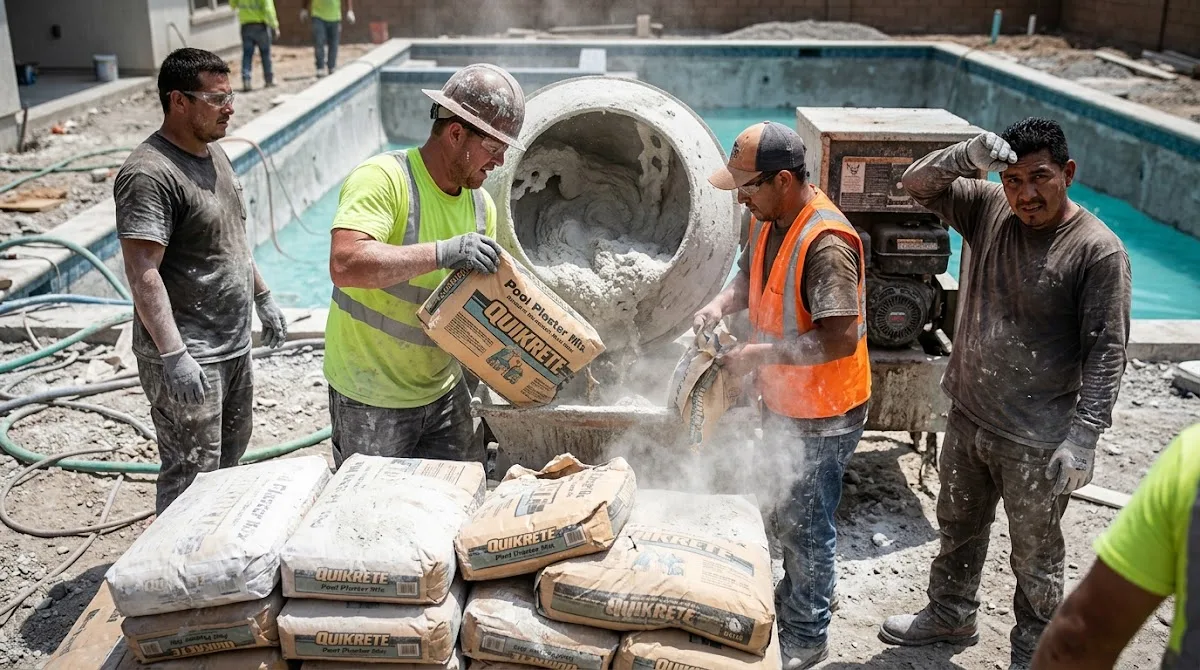
Then there’s the labor. A standard plaster pool can require multiple skids of sand and cement bags. You are lifting, mixing, hauling, and placing material fast, often in heat, under pressure, and on a hard deadline. It gets messy quickly.
And timing matters more than most people expect. If your bucket starts a false set, the material stiffens early. You must agitate it immediately or lose the batch. Wait too long, and your finish quality drops fast.
If you’re still weighing the job, review this DIY pool plaster resource before you start resurfacing. It helps frame the real scope of a DIY project.
Understanding the Chemistry of Swimming Pool Plaster
Pool plaster is a cement-based finish applied over a concrete pool shell. In basic terms, it usually contains white cement, fine aggregate, and liquid acrylic polymers.
Those polymers matter. During curing, they help create a cross-linked matrix that improves bond and performance. But they do not turn a legacy plaster surface into true waterproofing. That’s an important distinction.
Here’s why the chemistry matters. Type 1 portland cement can have porosity ranging from 12% to 38%. That variable affects compressive strength, which can range from a weak 4 Kpsi to a much more durable 12 Kpsi. More porosity usually means easier water movement, lower durability, and a shorter lifespan.
Setting time is just as critical. Per ASTM standards, initial set should be no less than 60 minutes, and final set should be no more than 10 hours. In plain language, your plaster needs enough open time to work, but not so much that curing drags and weakens the finish.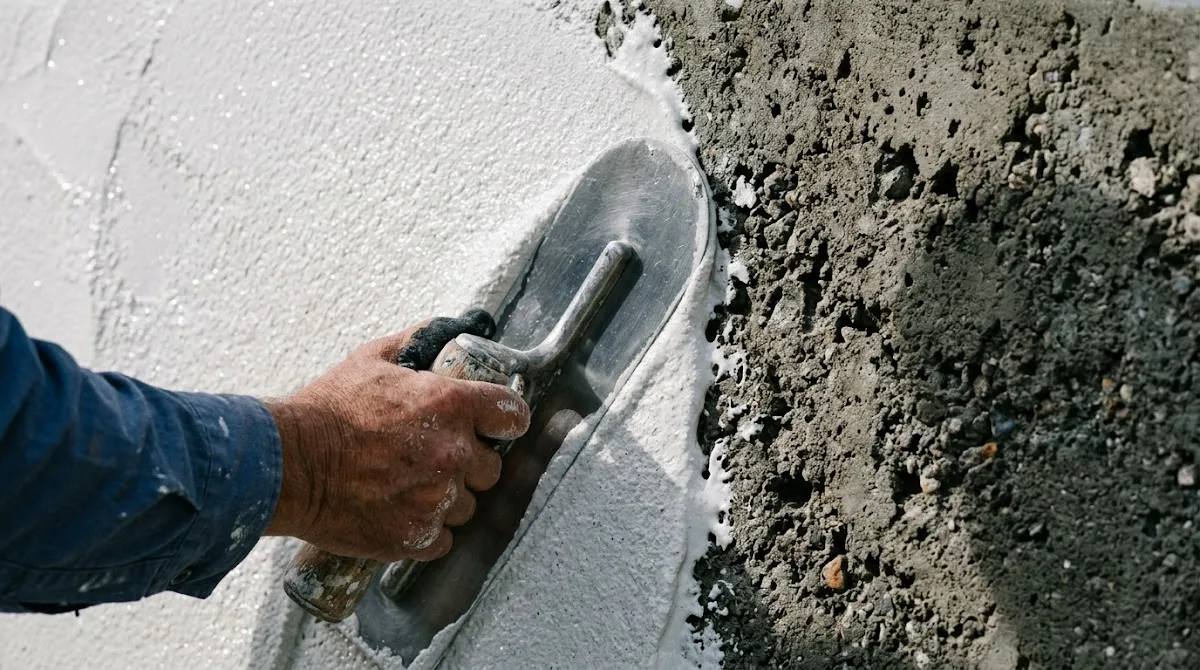
The choice of aggregate also changes how the plasterer experiences the job and how the pool surface performs later.
| Aggregate Type | Workability | Durability & Chemical Resistance | Professional Consensus |
|---|---|---|---|
| Marble Dust | Easier to spread | Soft stone; faster etch and erosion | Often chosen for easier trowel work, but wears faster |
| Silica/Quartz Sand | Heavier, harder to trowel | Very hard; highly resistant to pool chemical exposure | Preferred for long-lasting contractor-grade work |
Think about it this way. Marble can feel friendlier during application. Quartz and silica tend to reward you later.
Also, water chemistry matters from day one. Poor calcium balance, aggressive chlorine levels, or neglected startup care can stain, scale, or mottle even new plaster.
Crucial Preparation Before You Start Resurfacing
Prep is where many pool owners lose the job before the first wall is coated.
The substrate must be clean, rough, and ready to bond. That usually means a heavy acid wash, removal of weak material, and bringing the shell to a saturated surface dry condition. Saturate the shell properly, but do not leave standing water. You want moisture in the concrete, not a slick film on top.
A bonding coat is next. Typically, this is a thin blend of white Portland cement and an acrylic fortifier rolled onto the pool shell to create a stippled surface for adhesion. If that slurry flashes too quickly or sits too long, de-lamination becomes much more likely.
Here’s the trap. Applying new plaster over polished, dense, or vibrated concrete is asking for failure. The surface must be dulled first. If not, separation can happen even when the finish looks fine on day one.
This is also where the type of pool matters. A residential concrete pool, spa, or complex custom shape may need different access planning, sequencing, and detailing around tile, fittings, and the deck edge.
Essential Tools Needed to Resurface a Pool Like an Expert
Standard flat tools do not belong in curved pool work. You need rounded tools designed for coves, radius corners, and transitions.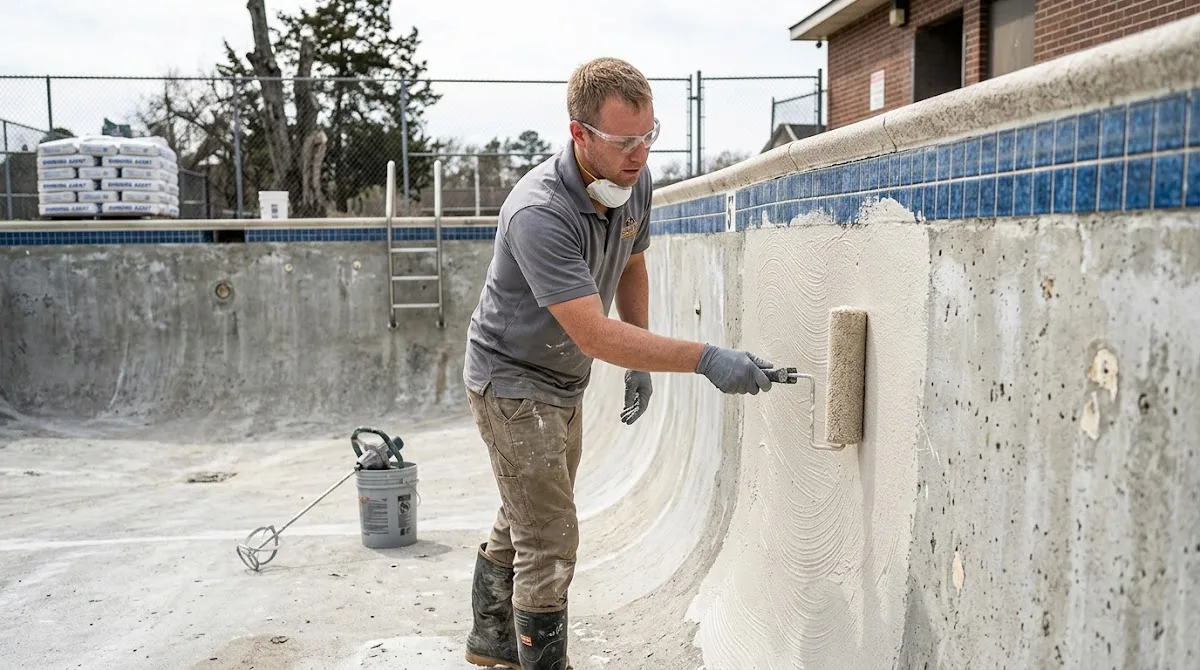
A rounded pool trowel is the main tool. It helps you compress and smooth plaster without digging sharp lines into the surface. Sponge tools have a place, but mostly for pushing material into corners early. For the main finish, they’re too abrasive.
Spiked shoes are not optional. Once the material reaches initial set, they let you move across the floor with less damage. They spread weight over a small area and reduce deep prints that can leave lasting trowel marks or low spots.
Other essentials include:
- Buckets and a reliable mixer
- Measuring tools for each batch
- Hoses and a pump plan for immediate fill
- Adjustable poles and edge tools
- Safety gear for acid and dust
- A cleaner setup for final prep
Many pool jobs fail because the installer tries to improvise with generic concrete tools. In a swimming pool, the wrong tool leaves a mark you may stare at for years.
The Application Process for Different Types of Swimming Pools
Now the hard part.
Material is generally applied at about 1/2 inch to 3/4 inch thick across the entire pool shell. Walls come first. The floor follows immediately. The goal is one continuous installation process completed in one day.
That sequencing is non-negotiable. Stop too long between sections and bond lines can telegraph through the finish. Worse, the plaster surface can cure unevenly, which increases the risk of discoloration and craze cracking.
Common failures during application include:
- De-lamination: new plaster separates from the bond coat
- Crazing: a web of fine cracks caused by rapid moisture loss
- Sloughing: wet material slides off a wall
- Burning: overworked troweling darkens the finish permanently
Weather conditions make all of this harder. Heat speeds set. Wind pulls moisture from the surface. Cold slows cure. Every one of those factors changes how the mix plaster behaves under your hand.
Once the final pass is complete, fill the pool immediately. Keeping the finish submerged in water slows curing and limits shrinkage. Delay that fill, and the odds of discoloration, craze lines, or rough texture rise.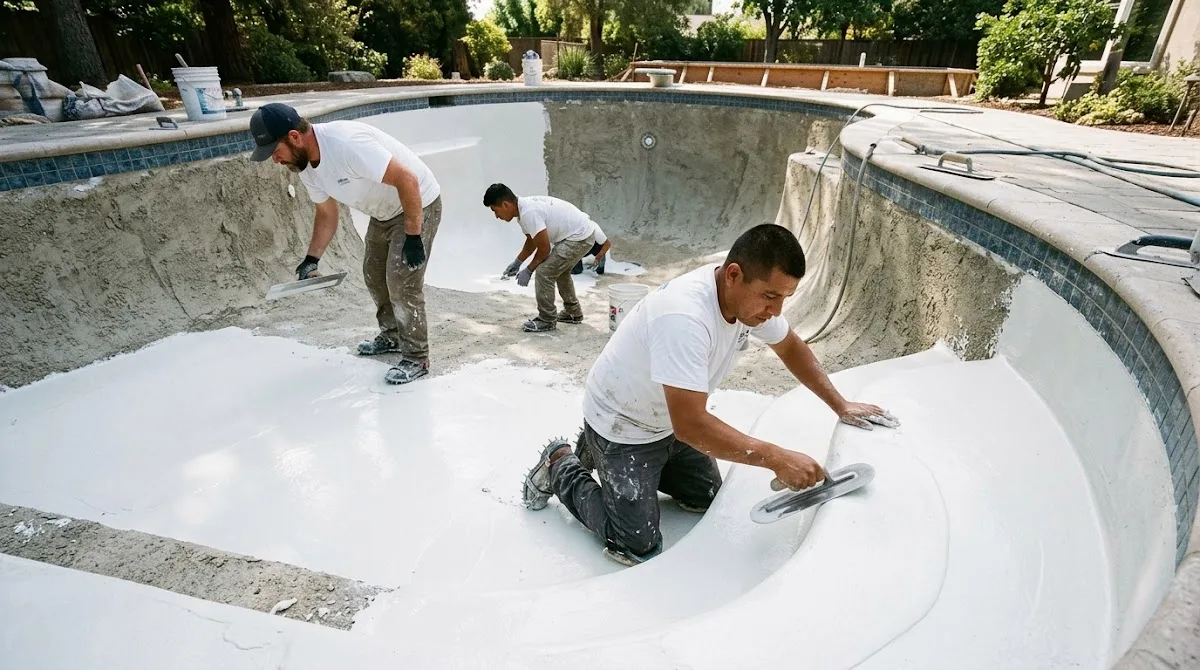
If your existing pool has a liner system, this guide is not your path. Vinyl liners and plaster are different assemblies. The same goes for some pebble and specialty refinish systems.
The Waterproofing Myth in Standard Pool Plaster
Here’s the part that surprises many pool owners.
Traditional white plaster is a cosmetic and wear layer. It is water-resistant, but it is not true structural waterproofing. Water still moves through it. Over time, that porosity contributes to etch, scaling, stain issues, and general wear.
It also offers no built-in protection against microbes. Legacy plaster relies on sanitizer alone. In many pool environments, that means heavy chemical management to control algae, bacteria, and other contamination.
That’s why the swimming pool industry has been moving toward more advanced systems. A modern alternative is a multi-part micro-ceramic finish that combines a luxury finish with waterproofing performance. When that system is ASTM, NSF, and Miami-Dade NOA certified, the conversation changes. Add antimicrobial, antibacterial, and antiviral properties, and the upgrade becomes more than cosmetic.
If you want to understand that shift better, read about microplaster waterproofing. It explains why many pool and construction projects no longer treat plaster alone as enough.
DIY Pool Crack Repair: When to Patch and When to Hire a Pro
Not every crack means panic.
Hairline flaws can often be patched underwater with a putty knife and a compatible patch material. For a small crack, that may buy time without needing to drain the vessel.
A larger opening usually requires more work. You drain the pool, widen the crack slightly for grip, patch it, and allow proper cure before refill. That is basic repair, not full replastering.
But there’s a clear line. If you see spreading structural movement, measurable water loss, or repeated failure in the same area, stop the DIY effort and hire a pro. At that point, the issue may be in the shell, not just the finish.
For deeper guidance, see plaster repair. It helps you judge whether you’re dealing with a simple patch or a bigger structural problem.
Conclusion
DIY pool plaster can work in limited cases, but it is harder than it looks. Success depends on prep, timing, tools, and careful curing. Standard plaster is also not true waterproofing. If you want a smooth, durable, long-lasting finish with better protection, choose your system carefully and know when to bring in expert help.
Frequently Asked Questions About DIY Pool Plaster
How do you make pool plaster?
Pool plaster is a mix of white cement, fine sand, water, and additives for bond and workability.
What can I substitute for plaster?
A common alternative is a micro-ceramic waterproof finish designed for better durability and performance.
Can you replaster a pool by yourself?
Yes, but DIY pool resurfacing is difficult, labor-heavy, and easy to get wrong.
How much does it cost to replaster a 15000 gallon pool?
Cost varies by surface condition, region, material, and workmanship.
How to make your own plaster from scratch?
You blend white cement, aggregate, water, and modifiers, then control the mix carefully.
Is it legal to skinny dip in your backyard pool?
Usually yes on private property, but local laws and visibility to neighbors can change that.